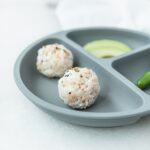
These simple salmon and rice sushi balls are easy to make and a delicious way for little ones to experience nutritious salmon and rice. They are baby led weaning friendly, but kids and parents of all ages will love them too!

This post has been written and medically reviewed by Kaleigh McMordie, MCN, RDN (Registered Dietitian Nutritionist).
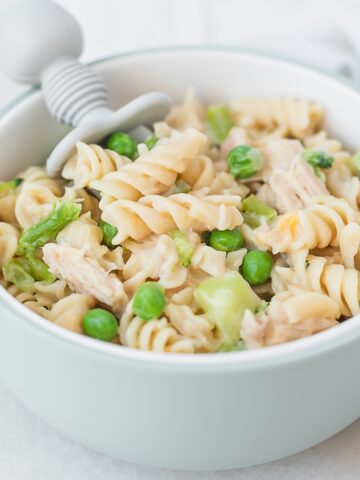
Salmon and Rice Sushi Balls
Rice is one of those tricky foods to serve to babies (and even to toddlers) who can't quite get the hang of getting the tiny grains into their mouths without making it into confetti on the floor (and table, and high chair). That's where these sushi balls come in. Made with just a few simple ingredients, these rice balls are bound together with nutrient-dense cooked salmon and a few baby-friendly flavor boosters that make them both delicious and easy for baby to grasp - and actually get into their mouths and bellies. Baby will love them, and you will too, mama!
Jump to:

Ingredients
- Cooked sushi rice - Sushi rice is stickier, making it easier to form into balls that hold their shape. If you can't specifically find sushi rice, look for another short grain rice.
- Cooked salmon - You'll need about 3-4 ounces. This recipe is a great use for a single leftover filet!
- Mayo - A little mayonnaise helps bind everything together. You can also use Greek yogurt.
- Rice vinegar - Adds flavor to the rice. If you don't have any, try a little squeeze of lime juice.
- Sesame oil - More delicious sushi flavor, You can use toasted or untoasted.
- Green onion - A little finely chopped green onion makes these extra delicious. You can use chives in a pinch.
- Other optional mix-ins and flavorings: Finely shredded carrots, sesame seeds, seaweed flakes, sriracha (if you like things spicy), soy sauce for dipping.
Helpful equipment: a 2 tablespoon cookie scoop (#30) makes forming the balls easier
Step By Step Instructions
For the full printable recipe, scroll to the recipe card at the bottom of the page.

- In a large bowl, use a fork to break the salmon into flakes.
- Add the rice and remaining ingredients to the bowl with the salmon and mix well, smushing everything together.
- Use a cookie scoop to make roughly 2 tablespoon balls (or about the size of a golf ball). Using wet hands or gloves, gently roll and press the balls into more uniform round shapes.
- Optional: Sprinkle with sesame seeds or seaweed flakes.
Recipe Tips
- You can use gloves or wet your hands before rolling into balls to keep the mixture from sticking to your hands.
- I find it easier to make these sushi balls with freshly cooked rice, since it tends to be stickier. (They are also delicious eaten still warm!) If you are using leftover rice, add a tiny splash of water and reheat it until it's warm and a little more sticky.
- Short grain rice is important since it is more glutinous, meaning it will stick together and hold a ball shape better than long grain rice. If you can't specifically find sushi rice, you can use another short to medium grain rice.
Storage
These are delicious eaten warm or cold. Store sushi balls in an airtight container in the refrigerator for up to 4 days. I don't recommend freezing them, or reheating them after cooling.
Allergen Alert! These sushi balls contain top allergens (fish and sesame). Make sure your little one has been safely introduced to each allergen individually before serving these balls. Once your baby has been introduced to allergens, it's a good idea to keep them in the rotation regularly, like in these sushi balls!

How To Serve Sushi Balls To Babies 6 Months and Up
For baby led weaning babies as young as 6 months old, you can plop a whole ball right on baby's tray or plate. The ball shape is easiest for baby to pick up and bring to his mouth. For spoon fed babies, wait until they reach the finger food stage before offering a whole ball. They are also great for toddlers to practice taking bites.

Track your baby's journey through starting solids! Get my 100 First Foods Checklist and Allergen Checklist Bundle today!
Baby Friendly Salmon and Rice Sushi Balls Recipe
These simple sushi rice balls with salmon are easy to make and a delicious way for little ones to experience nutritious salmon and rice. They are baby led weaning friendly, but kids and parents of all ages will love them too!
- Prep Time: 10 minutes
- Cook Time: 0 minutes
- Total Time: 10 minutes
- Yield: about 10 balls 1x
- Category: main dish
- Method: no cook
- Cuisine: baby/toddler
Ingredients
- 1 (about 4 oz) cooked salmon filet, skin removed
- 1 cup plain cooked sushi rice or other short grain rice
- 1 tbsp mayonnaise
- 1 tsp rice vinegar
- ½ tsp sesame oil
- 1 tbsp chopped green onion
- Other optional mix-ins or toppings (see notes)
Instructions
- In a large bowl, use a fork to mash the cooked salmon into small flakes.
- Add the cooked rice and remaining ingredients (mayo, rice vinegar, sesame oil, green onion). Stir well to combine.
- Scoop the mixture into 2-tbsp balls (a cookie scoop is helpful - a #30 scoop is 2 tbsps.) and use wet hands or gloved hands to roll and gently press into tighter ball shapes.
- Serve immediately or refrigerate in an airtight container for up to 4 days.
Equipment
 Buy Now →
 Notes
- Optional mix-ins or toppings: finely shredded carrots, sesame seeds, seaweed flakes, sriracha (if you like things spicy) or soy sauce for dipping.
- Substitutions: You can swap Greek yogurt for mayo and lime juice for rice vinegar.
- I find it easier to make these sushi balls with freshly cooked rice, since it tends to be stickier. (They are also delicious eaten still warm!) If you are using leftover rice, add a tiny splash of water and reheat it until it's warm and a little more sticky.
- Sushi rice or another short grain rice is important since it is more glutinous (sticky) and will hold a ball shape better than long grain rice. If you can't find sushi rice specifically, use another short grain or medium grain rice.
- To cook the rice: Rinse and drain ½ cup short grain rice. Add rice to a saucepan with ¾ cup water. Cover with a tight fitting lid and bring to a boil. Lower heat and simmer (covered, without stirring) 15-20 minutes. Let stand 5 minutes with the lid.
- To cook the salmon: If you haven't cooked the salmon, my favorite quick and easy way to cook it is to place it on a parchment-lined baking sheet and bake at 400°F until it is opaque at easily flakes with a fork, usually about 10-15 minutes depending on the thickness of the fish.
Leave a Reply